Real Case: Testing Materials with RoomLab Before Renovating My Kitchen
I was about to renovate my kitchen. The furniture store had prepared 3D renders of the design and, overall, I liked the layout. But looking at those renders on a screen, I still had a long list of doubts: would the stainless steel appliances really be the right call? What about the brick backsplash — would I get tired of it? And the countertop material — how could I be sure from a tiny sample?
Before committing to any purchases, I decided to try RoomLab to test my options and see how different choices would actually look in the space. Here is how I used several of its features, step by step, to gain confidence before signing anything.
Step One: From 3D Render to Photorealistic Image
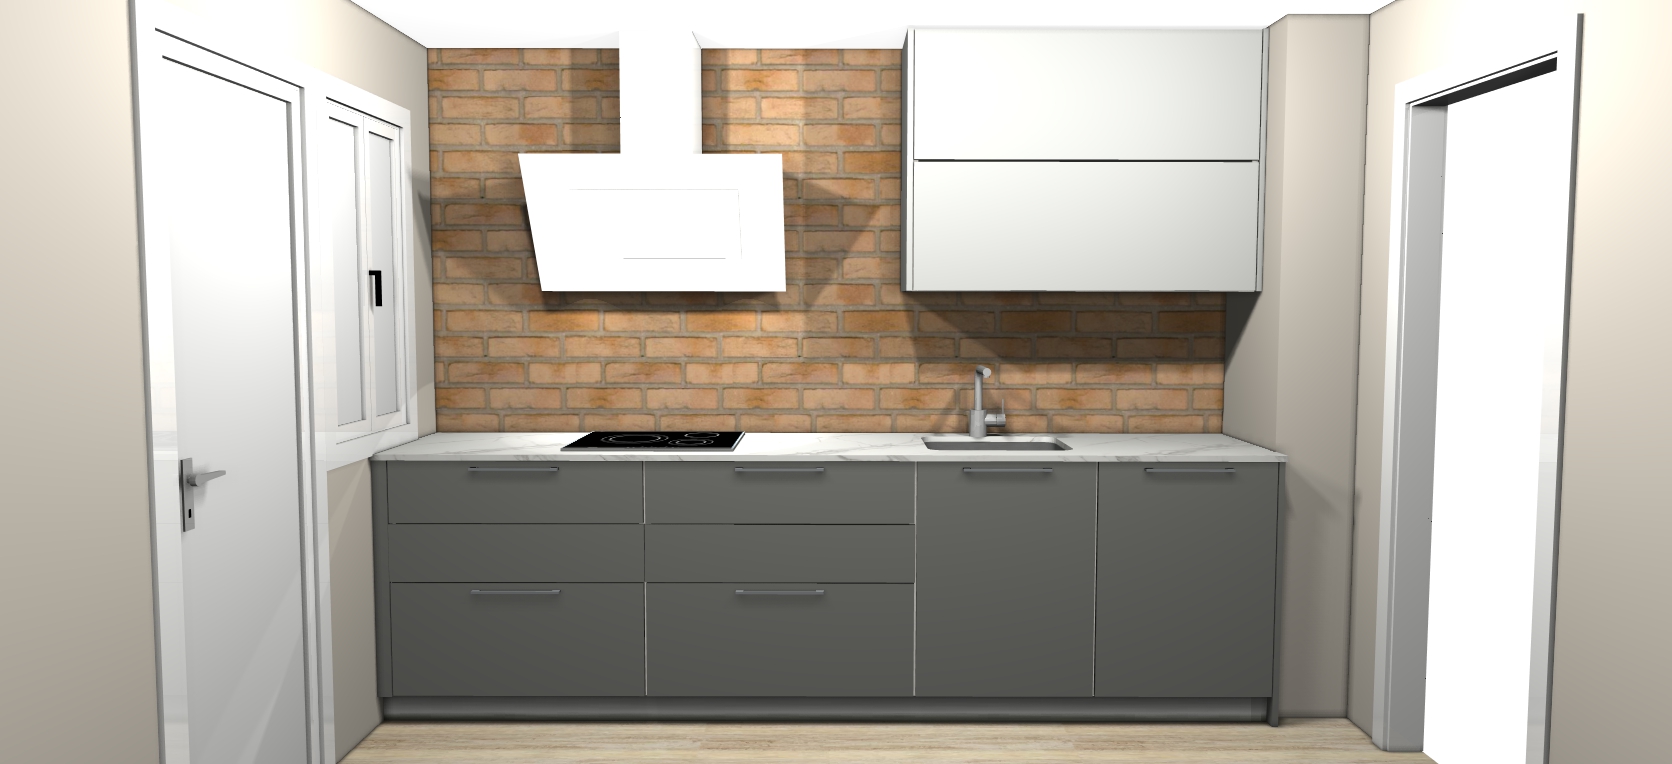
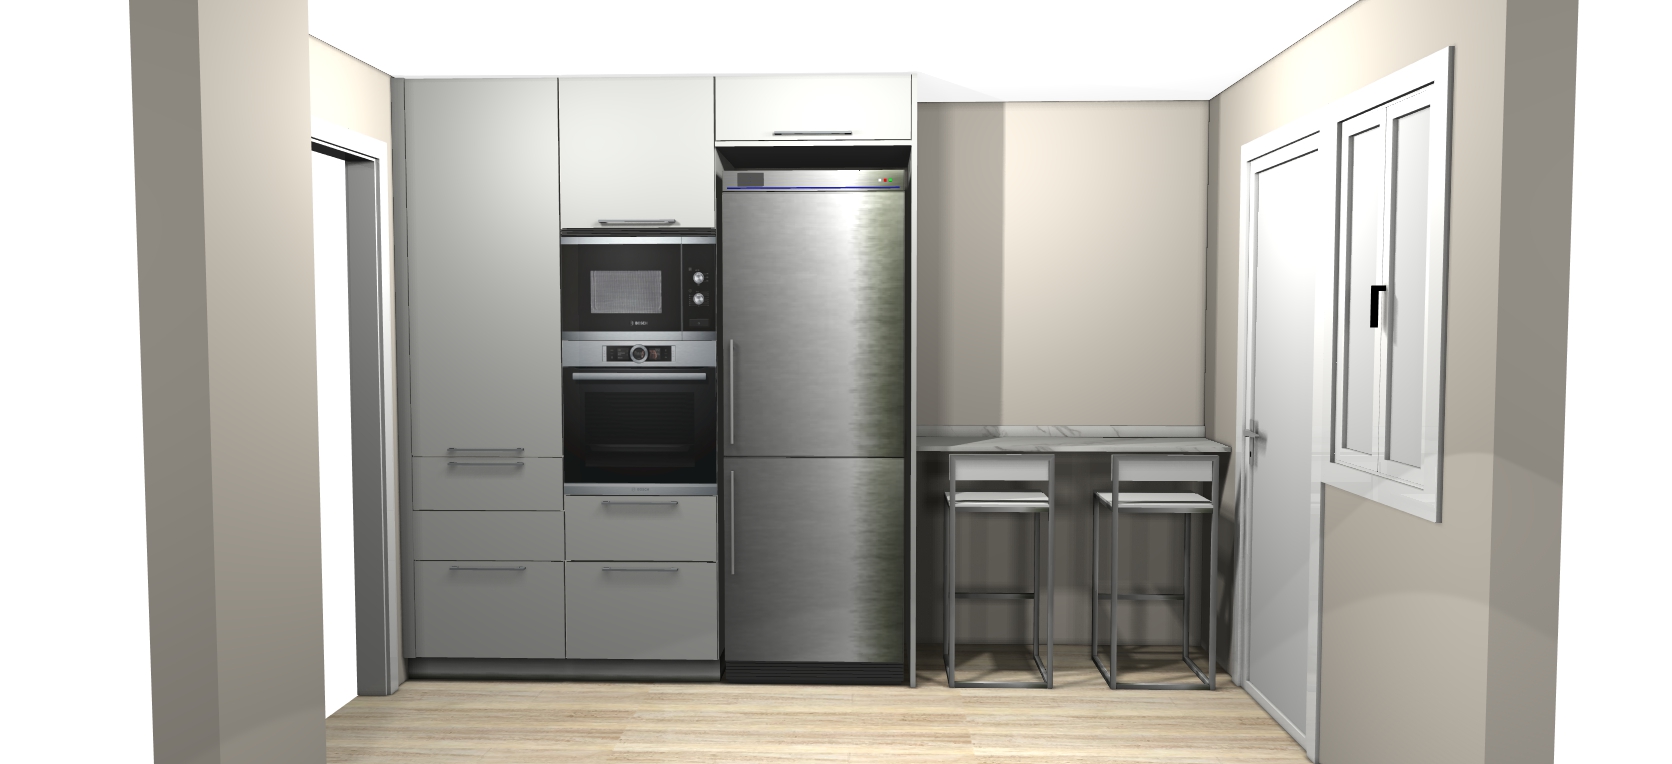
The very first thing I did was tackle the renders themselves. The store's 3D images looked obviously digital — flat lighting, plastic-looking surfaces, the kind of output that makes it hard to judge how anything will actually feel in real life. So I ran them through RoomLab's Architectural Render (3D to Render), which transformed those flat CGI images into photorealistic-looking photographs. Suddenly the kitchen looked like a real room, not a video game screenshot, and it became much easier to evaluate everything else from there.
The Starting Point: The Store's 3D Renders
The store gave me two views of the kitchen:
Once I had the photorealistic versions from Architectural Render, I could start testing real changes. This is where it got interesting.
Testing Materials and Colors
The store gave me a physical Silestone sample for the countertop — a marble-like slab in white and beige tones with subtle grey veins. It looked beautiful in my hand, but I had no way of knowing how it would feel spread across the entire worktop, surrounded by the cabinets and backsplash.
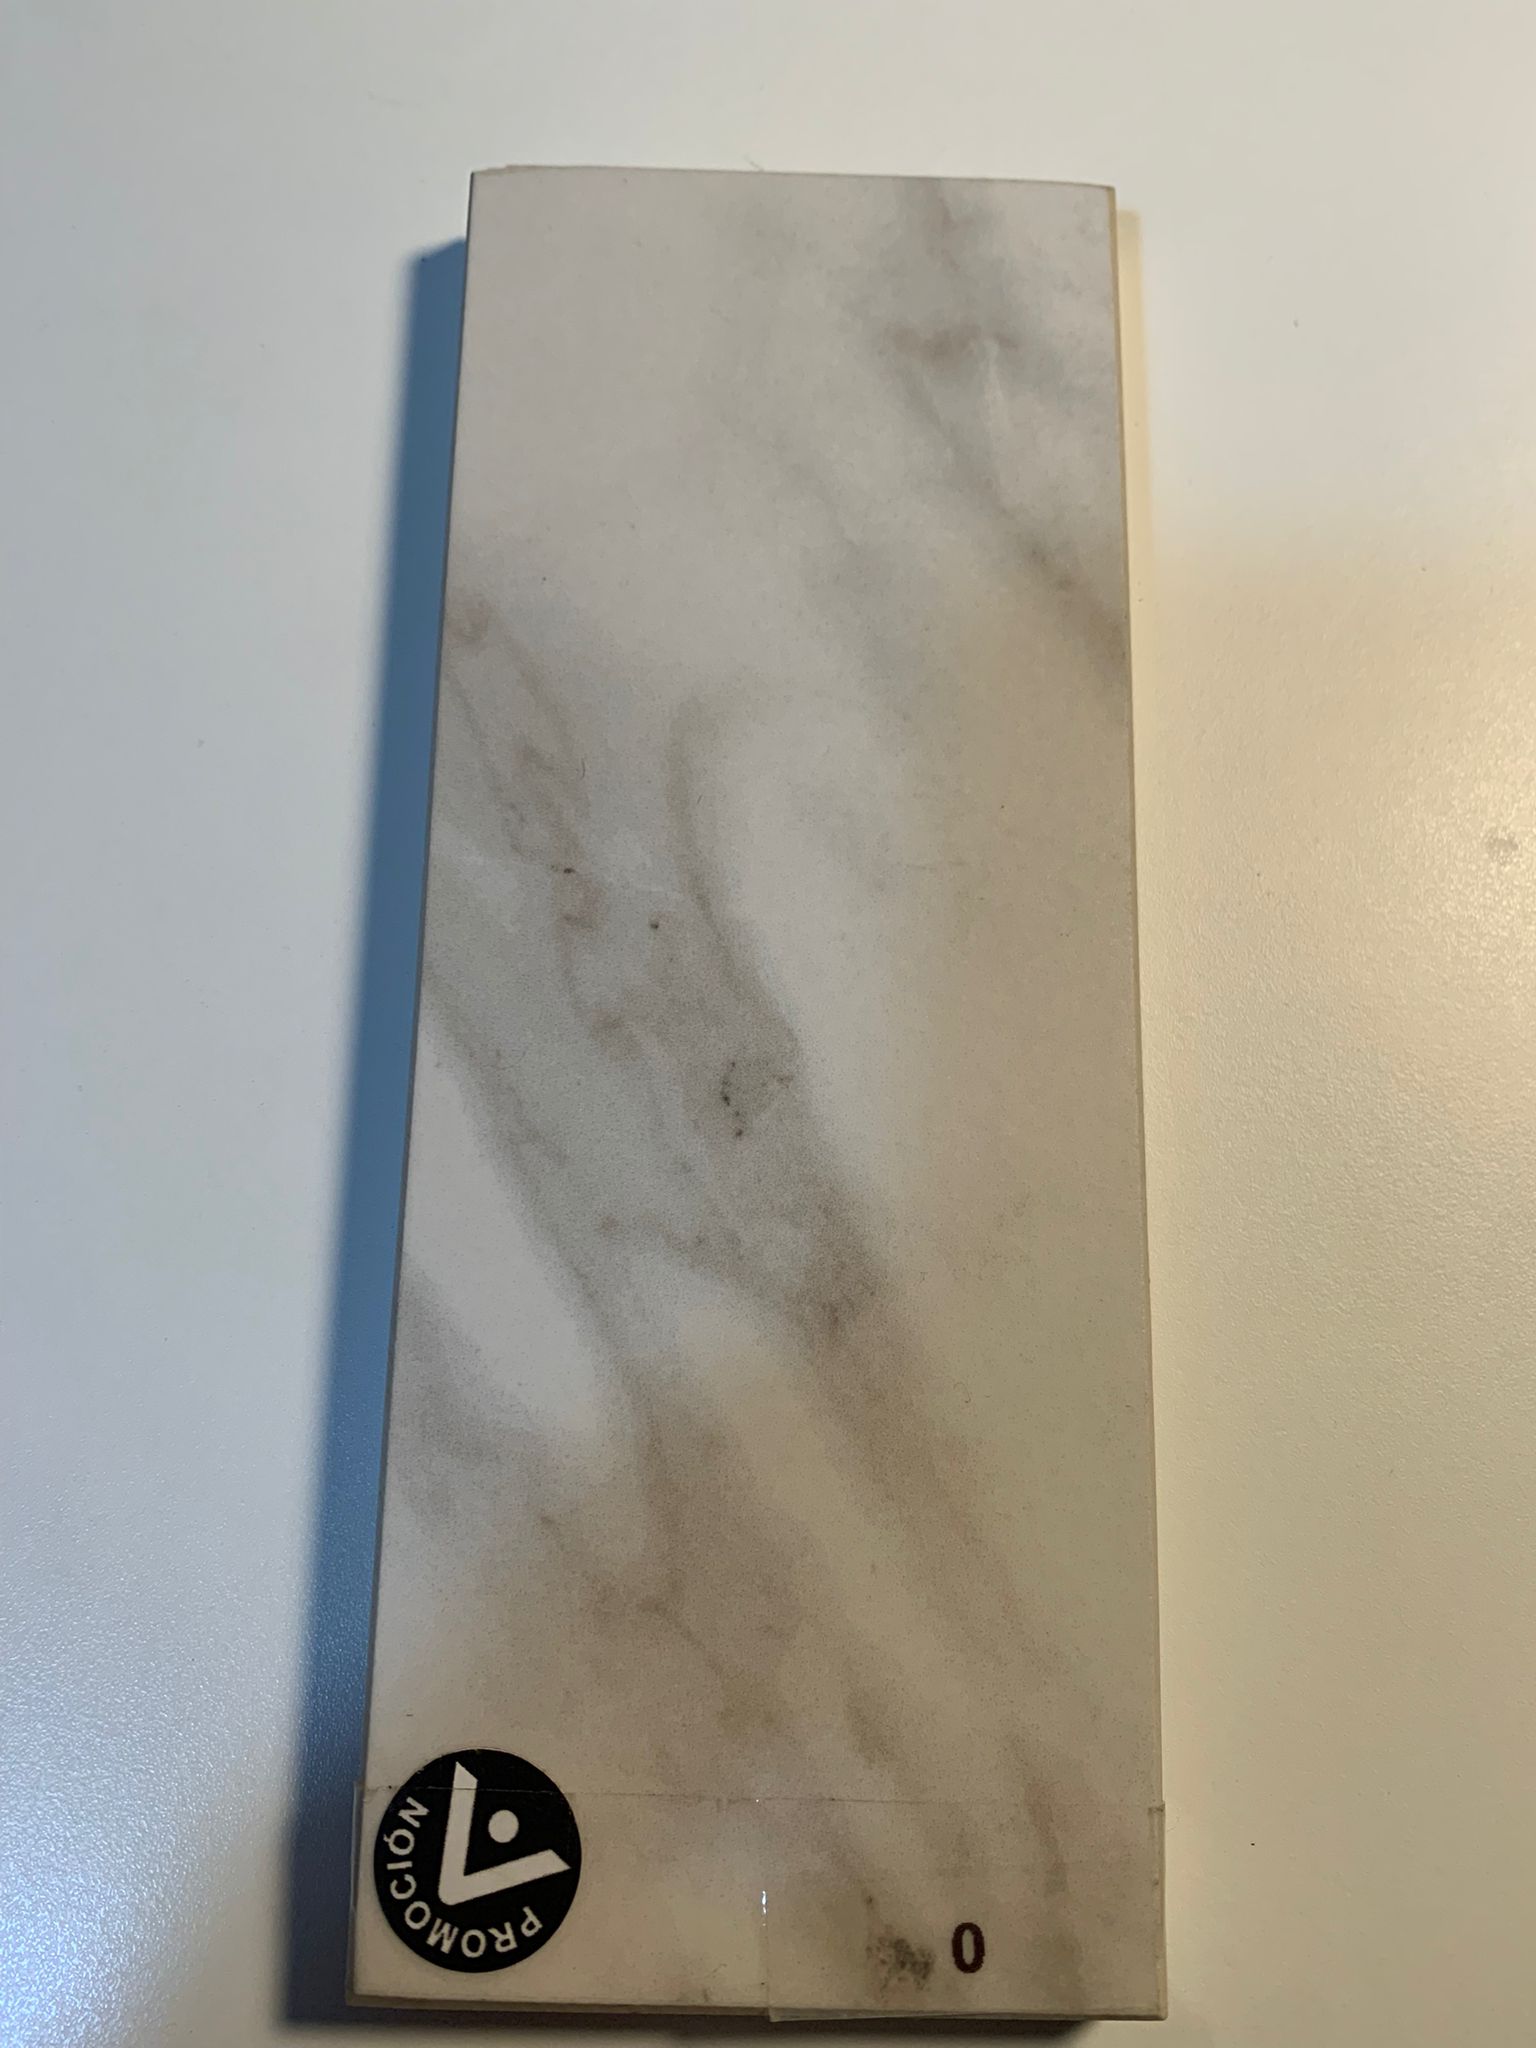
I photographed the sample and used RoomLab's Replace Materials feature to apply it to the countertop in the render. Going from a small swatch to seeing it in the full context of the room — that is the kind of thing that gives you real confidence before placing an order.
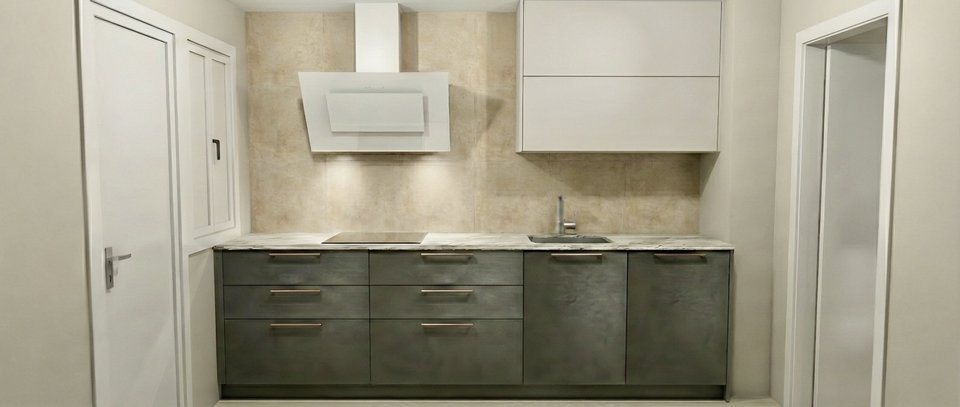
With the same Replace Materials feature, I also tested other surface changes: I swapped the brick backsplash for lighter sand-colored tiles and shifted the lower cabinet color from grey to a darker green tone. I also tried different handles on the cabinets using the Replace Furniture & Materials feature. Each change took just a few seconds, and I could immediately see how they worked together — or didn't.
The Personal Touch
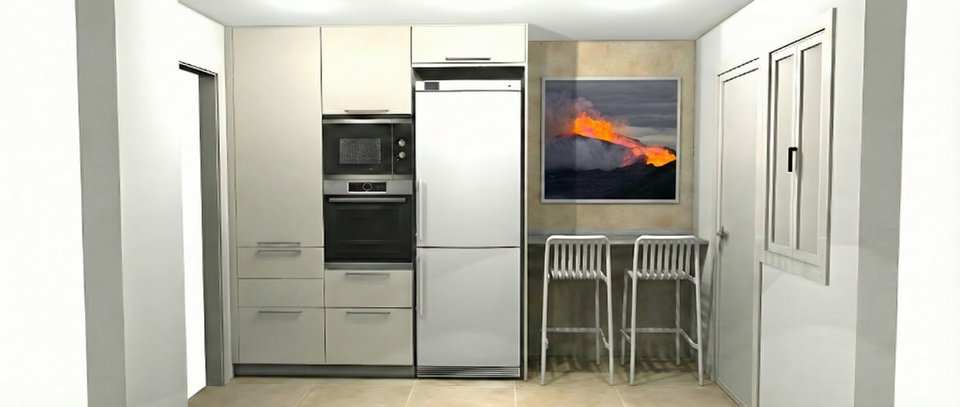
I used the Replace Furniture feature to swap the stainless steel fridge for a white one — it blends much better with the upper cabinets. I also replaced the metal bar stools with white ones from INKO.

But the change that made the kitchen feel truly ours was adding a painting. Using RoomLab's Custom Prompt, I added a painting based on a photograph my son took during a trip to Iceland — a shot of the Fagradalsfjall volcano, which erupted in 2021. Seeing it on the kitchen wall, with the lava glow against the green cabinets, turned the design from "nice kitchen" into "our kitchen."
The Results: Before and After
Drag the slider to compare — the left wall went from grey cabinets and brick backsplash to Silestone countertop, sand-colored tiles, and darker green cabinets:

And the right wall — stainless steel fridge swapped for white, the Iceland volcano painting added, and the cohesive color palette tying everything together:

Conclusion: Test Before You Commit
RoomLab did not design my kitchen from scratch — the furniture store did that. What it gave me was the ability to test decisions before paying for them. I started by turning flat 3D renders into photorealistic images with Architectural Render, then used Replace Materials to try the Silestone countertop, new tiles, and cabinet colors. I swapped the fridge with Replace Furniture, tested handle styles, and added a personal painting with Custom Prompt — all in minutes, with no cost and no risk.
When you are renovating a kitchen, where dozens of materials, colors, and finishes need to work together, being able to see the full picture in advance is invaluable. It saved me from at least two mistakes I would have made otherwise.
If you are planning a renovation and want to try before you buy, see more examples of what RoomLab can do, or jump straight into the workspace.
Ready to Transform Your Space?
Start creating stunning room transformations in minutes. Sign up and try it yourself!